Configure Trimble R1 Receiver For Use With Collector For ArcGIS
Requirements:
- Trimble R1 Receiver
- Mobile Device
- iOS 8 or newer
- Android 4.1 or newer
- Windows 10.0.586 or later - Trimble's GNSS Status app (app store-OS dependent)
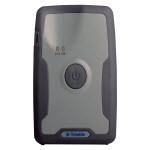
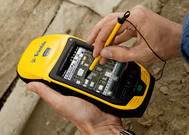
Receiver Overview:

- External antenna connector
- Bluetooth/GNSS Status LED
- Power Status LED
- Power button/Bluetooth pairing button
- Mini USB/charger connection (rear of device)
Steps:
- Turn on the mobile device and make sure Bluetooth is enabled
- Power up the Trimble F1
- Press and hold the power button until you see both the Bluetooth & power LEDs turn green. Then release the power button.
- The Bluetooth/GNSS status will start flashing between blue & yellow - Enable Bluetooth Pairing Mode on the R1
- Press and hold the power button until you see the Bluetooth LED flash blue (about 10 seconds). The power LED will be red. Release the power button.
- The Bluetooth LED will be flashing blue rapidly which indicates you are now in Bluetooth pairing mode. - Connect the R1 receiver to the mobile device
- Go to the Bluetooth settings of you mobile device. It should be searching for nearby Bluetooth devices. After a short period, the device will recognize the Trimble R1 receiver. It will be listed as "GNSS: <serial no>" (ie GNSS: 68033).
- Tap the listed R1 to pair it with the mobile device. - Enable Developer Options (Android only)
- Locate the Android build number for the device. Depending on what brand of device you own, there can be different paths to find it. A common path is Settings>About Phone>Software Info or Build Number.
- Once you find the build number, tap it 7 times. Each time you tap, a message will appear stating you have X amount of taps left to enable "Developer Options". On the final tap, a message will appear stating that Developer Options are enabled. - Enable Mock Locations (Android only)
- Once Developer Options are enabled, Mock Locations need to be turned on. Go back to the main settings screen. Locate Developer Options and tap it (it may be under System).
- Configure Mock Locations- On Android 4.1 to 5x, find the "Allow Mock Locations" section. Check the box to enable Mock Locations.
- On Android 6 and newer, find the "Select Mock Location App" section and tap on it. Choose GNSS Status from the list of appl.
- Use GNSS Status App to connect the R1 with the Collector for ArcGIS
- Open the GNSS Status App.
- Tap the "Select new receiver" at the bottom of the app.
- Tap the receiver serial no. for which you wish to connect. It will have the same name as the paired device from above.
- Once you tap the receiver, a symbol with 2 plugs will appear to the right of the receiver name. Tap the plugs to connect the receiver to the app.
- You will see the receiver name at the bottom of the home screen for the GNSS Status App. - Configure R1 to use SBAS real-time corrections

- Tap the menu button, and choose "Real-time Config"
- From the Real-time Config screen, tap "Edit" at the top right of the screen.
- Tap the "Primary Source Type" field. Choose SBAS from the list of correction types.
*In most cases, you must have a subscription to use any of the other real-time correction methods. SBAS is free out-of-the-box. Inquire with your Trimble dealer for more information or to obtain even better accuracy using RTX.
- Tap "Save". Then tap the menu button and return to the Home Screen.
- Once the GNSS Status app is connected to the R1 receiver and the SBAS service is in use, you will see "SBAS" populated in the bottom right-hand circle and the Estimated Accuracy will drop to <1m.
- Configure the Location Provider in Collector for ArcGIS
- Open the Collector for ArcGIS app on the device.
- From the Maps screen, tap the Menu button (3 vertical dots) to access Settings.
- Scroll down to the Location section. Tap on Location Provider.
- Tap on the (+) to Add a receiver. Choose the R1 from above in the list (GNSS: xxxx).
- Enter the approximate height you plan to hold the R1 during data collection as the Antenna Height. Three to four feet is sufficient for most users. Click OK.
- The click on your R1 receiver from the list.
- The device is now set up to collect data using the R1 external receiver with SBAS correction.
*NOTE: If you plan to use other real-time correction sources such as NC VRS, be sure to set the Location Profile correctly. Contact your Duncan-Parnell representative to find out more.
Related Posts
-
 Tech Tip: Trimble Access Version 2016.10
-
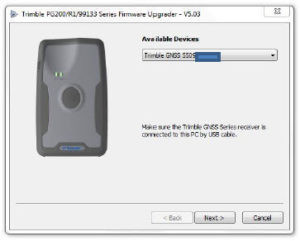 Tech Tip: Upgrading R1 Firmware to 5.03
-
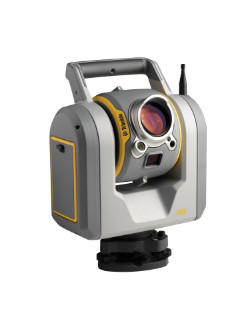 SX10 Scan Data In Trimble Business Center
Quick and Easy Scan Data Processing From the Trimble SX10
SX10 Scan Data In Trimble Business Center
Quick and Easy Scan Data Processing From the Trimble SX10 -
 How to Make a Continuous Laser Stream With the Geo7